

Host MERN/MEAN Stack Projects on a Live Server: A Comprehensive Guide with Nginx and Ubuntu
Effortlessly Deploy and Share Your MERN/MEAN Stack Projects with the World: A Complete Guide to Hosting on a Live Server using Nginx and Ubuntu


Table of contents
Hello Geeks,
I created various MERN stack projects over my career. Yet, I'm interested in learning how to host my software on a live server. How can consumers of my product utilize it? And to find the answers to all of these questions, I watched YouTube lessons and read blogs to learn how to host projects on live servers, and with their assistance, I did just that with my project. And because I know you're all here to learn about hosting your projects on live servers, I'll make it simple for you in this article.
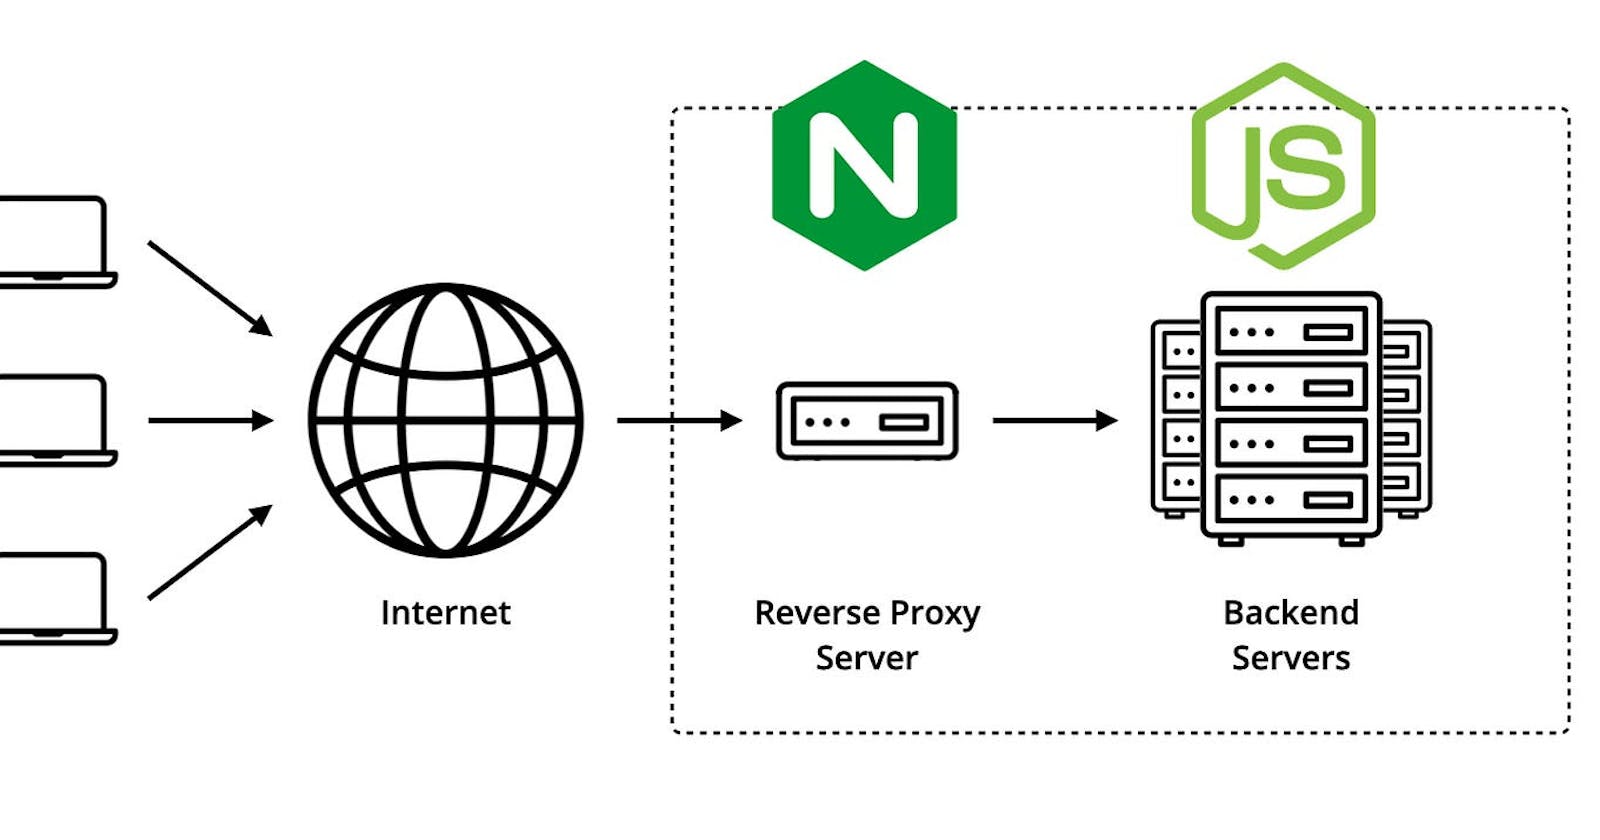
In this blog, we'll learn how to host MERN/MEAN and other stack projects on a server and connect our server IP to our domain.
We use Nginx on this blog. And Ubuntu OS, which was the most widely used operating system for servers and EC2 instances.
Prerequisite -:
Should know the basics of Nginx
Should be familiar with basic cmd commands in Ubuntu or Windows.
Setup -:
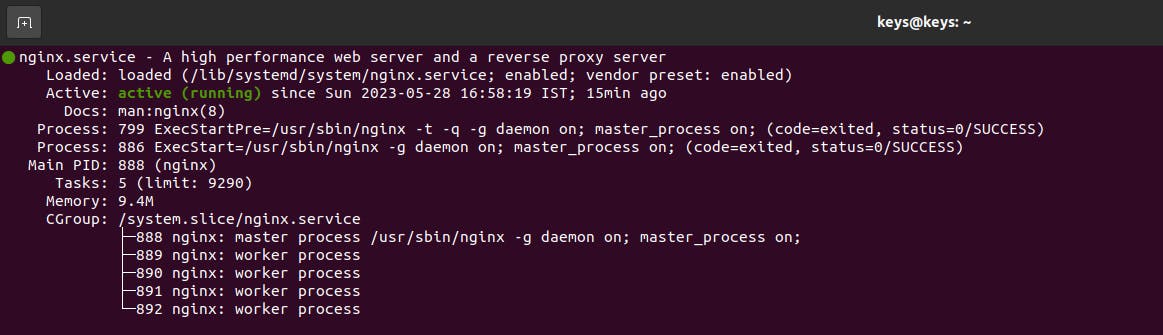
I'll assume that you've all installed Nginx before we start, and you can verify this by checking its status, Run the following command on your instance or server to verify its status.
sudo service nginx status
And if you see that it is active (running), as shown in the image below, then everything is set.
The next step is to clone the project repository to the server or instance. We may copy it to whatever directory we choose, but since the /var/www/html folder is where the Nginx server stores its web content by default, that's where I usually like to do it.
Change the permissions on the html folder to 777 before cloning your project. Run the command below at the /var/www directory to do this. then clone your project inside the html folder
sudo chmod 777 -R html

After successfully cloning our project repository, we need to locate its directory, which is at /etc/nginx. A folder titled "sites-available" can be seen inside this directory.

Change the permission of sites-available to read, write, and executable, which in Ubuntu is 777. Run the command below to carry it out.
sudo chmod 777 -R sites-available
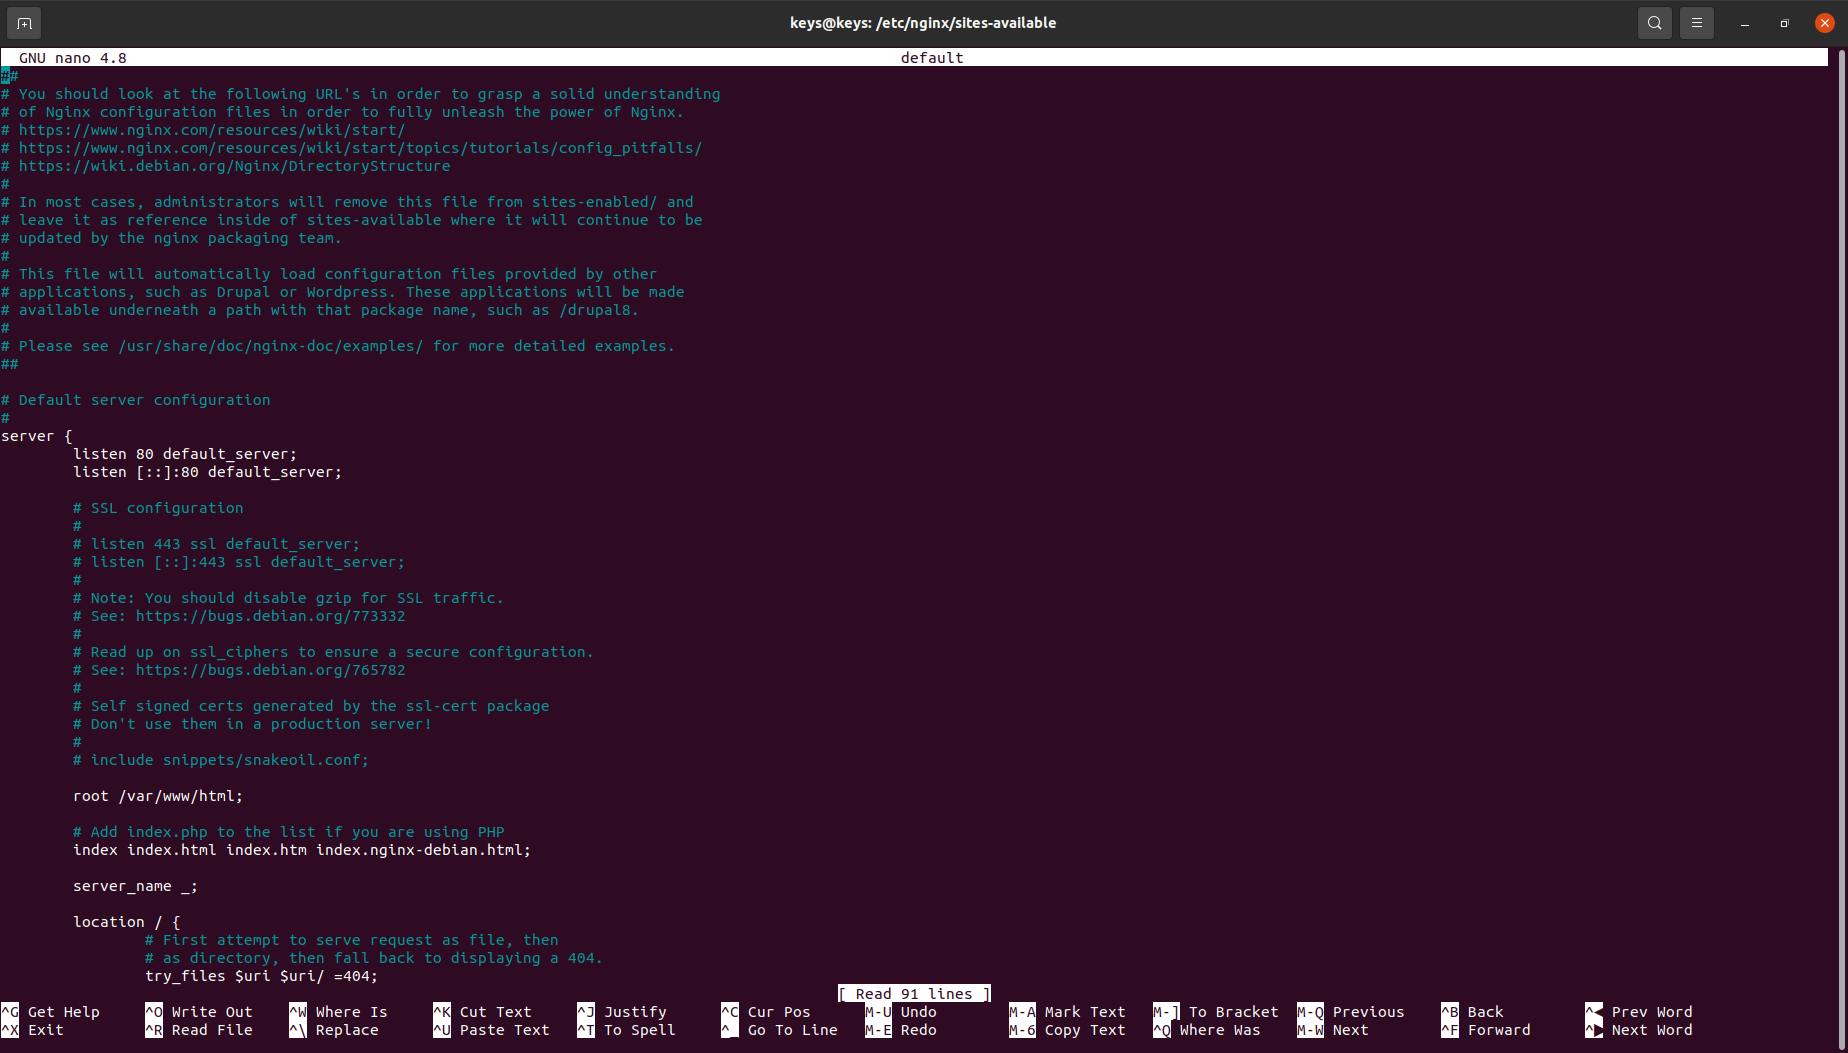
and now go into this sites-available folder. And inside this, you'll find the default file, which acts as a template for building server blocks for websites and other applications. And now run the below command to open this file in the command line to configure the server setup and add our project path to it.
sudo nano default
And you will see something like the below image inside this file
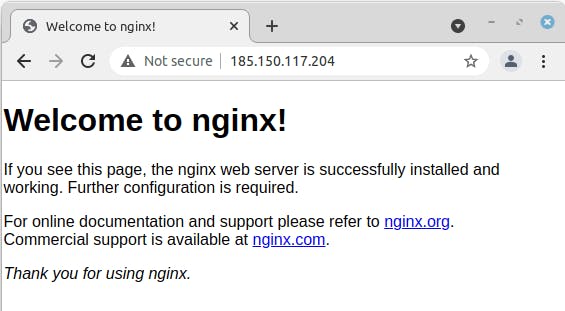
This is the default configuration of Nginx, which directs visitors to the Nginx home page. (You may also test by going to the URL associated with your IP address, which may look something like this: "http://your-server-ip-address\>") Based on this URL, you saw the image below.
It's time to modify the default Nginx web server for our project. To do this, we need to modify the server file that is shown in the below image.
server {
    root /var/www/html/<your-project-index-file-path>;
    index index.html index.htm index.nginx-debian.html;

    server_name _;

    location / {
                # First attempt to serve request as file, then
                # as directory, then fall back to displaying a 404\
                try_files $uri $uri/ /index.html?/$request_uri/;
        }
}
Now your default file should be looking like this
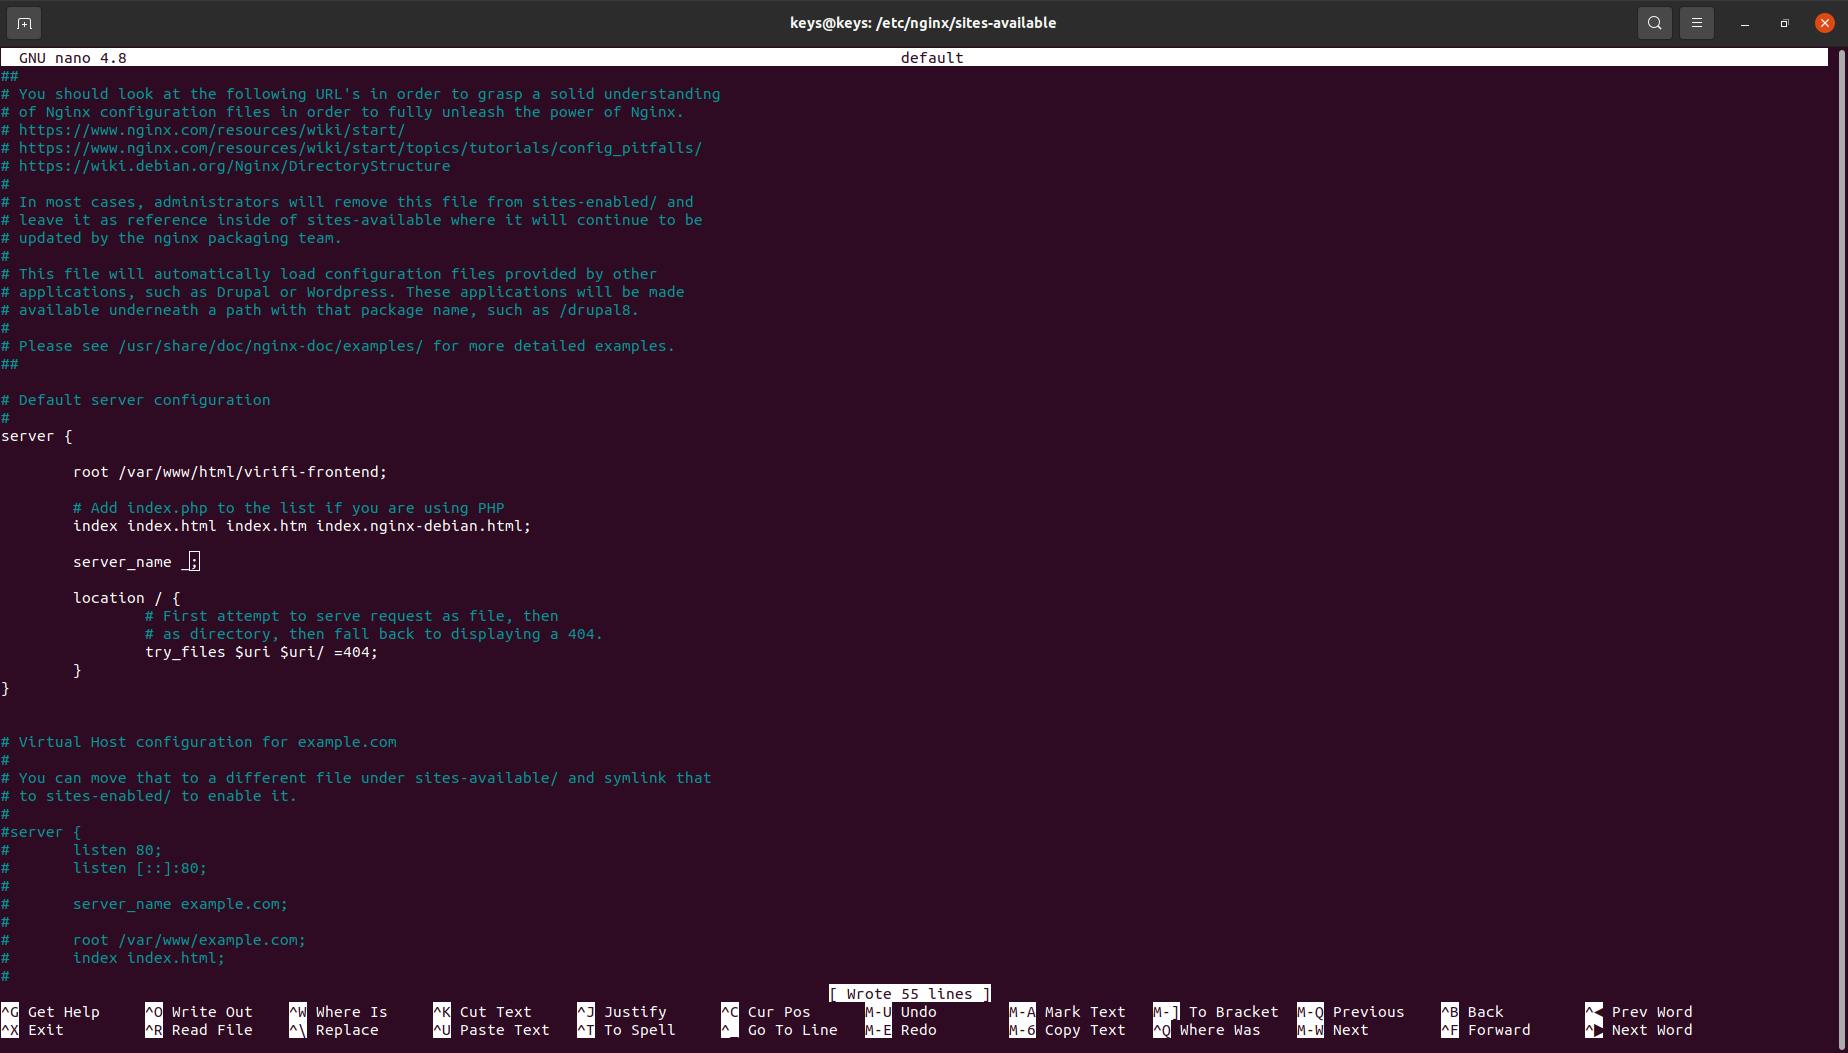
So, don't be surprised if you see that your default file is different from the image above. Here, # In this file, refers to the inline comment. Aside from this, everything else should be the same, so just be sure.
Okay, moving forward, we will learn every line of the above code. so that you can understand how things operate and how to modify them according to your use cases.
The
serverblock declaration at the start of the file contains the configuration for the default website. Theserverkeyword tends to go first, followed by the opening and closing curly braces.Root directory: The
rootdirective specifies the root directory where the website's files are located. For the default configuration, it is commonly set to/var/www/html/, which is the default web root directory.Index file: The
indexdirective defines the default file to be served when a request is made to a directory without specifying a particular file. Commonly, it is set toindex.html index.htm.Server name: The
server_namedirective defines the domain name(s) associated with the server block. The default configuration typically includes the server's IP address or domain name. Multiple server names can be specified, separated by spaces.Location blocks: The default configuration often includes one or more
locationblocks to define the behaviour for specific URL patterns or file types. For example:A
location /block handles requests to the root URL (/) and may contain additional configuration directives specific to the root path.A
location /static/block can be used to serve static files located in a specific directory, such as CSS or JavaScript files.A
location /api/block might be used to define the behaviour of an API endpoint.
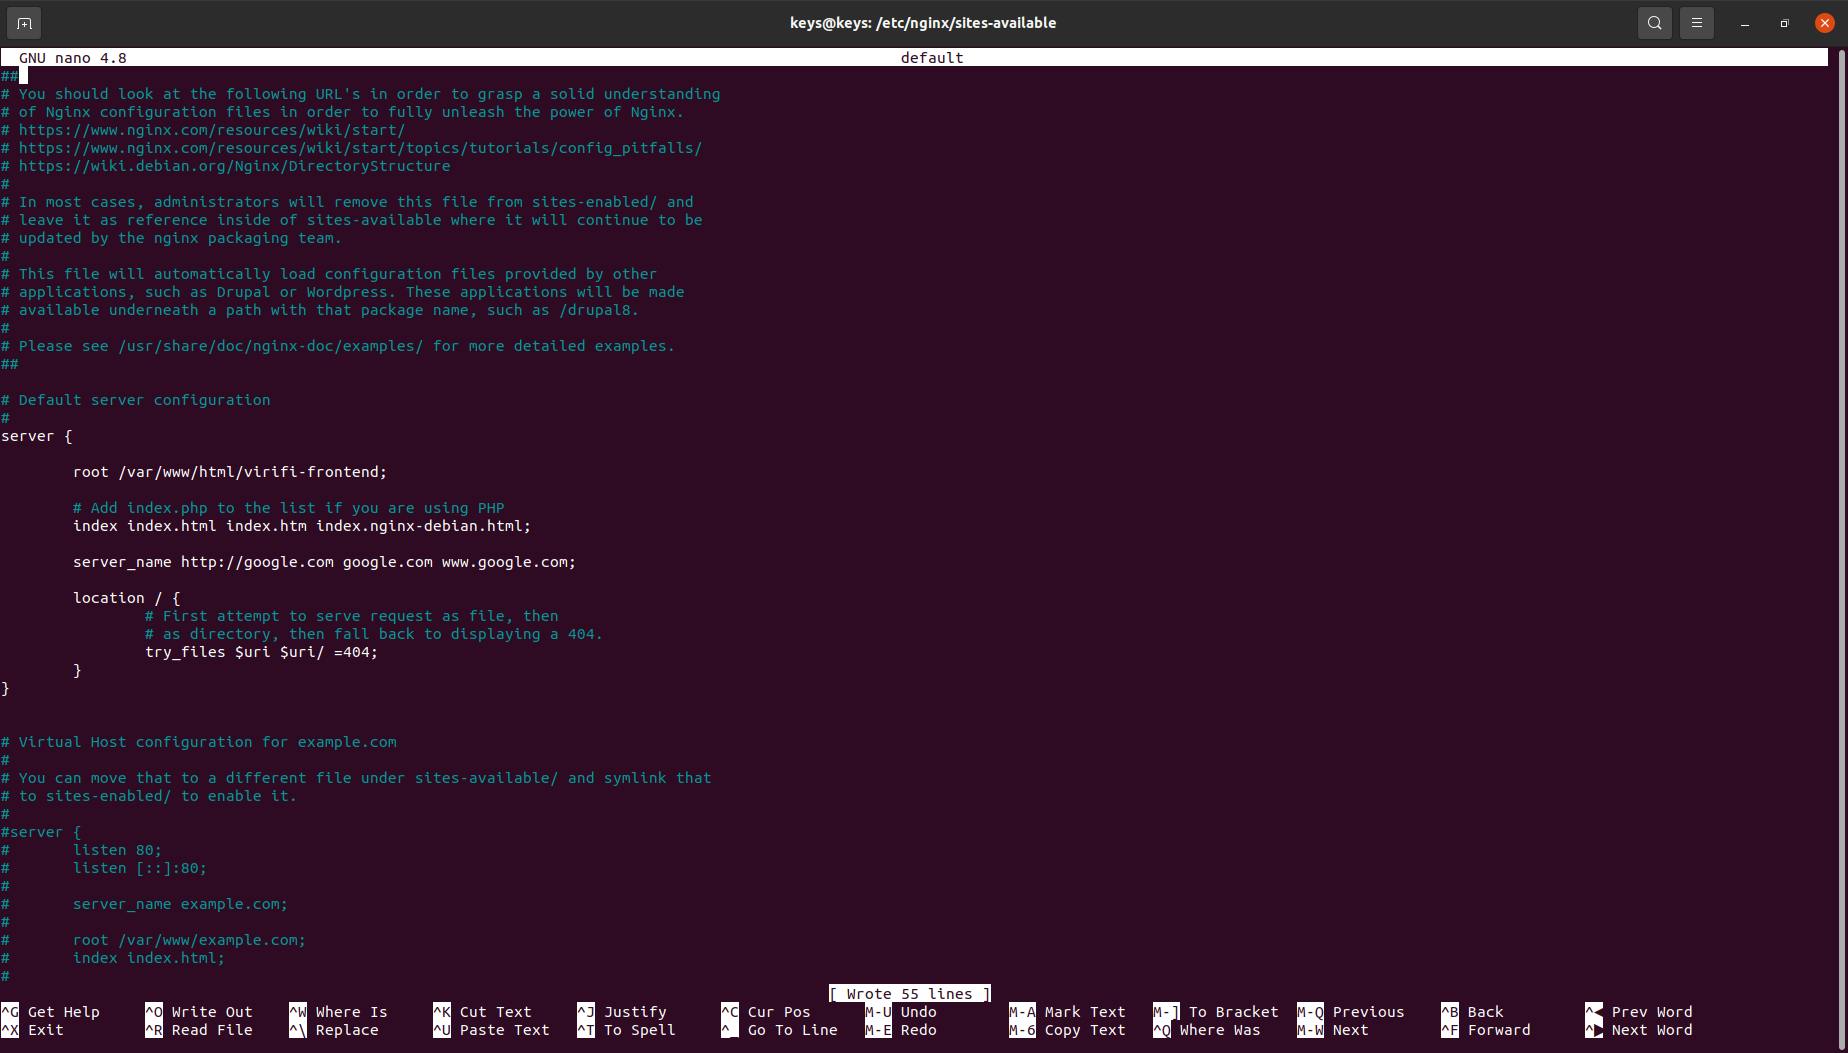
Your server file should appear as shown by the above information for each line.
server {
    root <path of your code folder>;
    index index.html index.htm index.nginx-debian.html;

    server_name http://<your-domain-name>.<your-domain-extension> <your-domain-name>.<your-domain-extension> www.<your-domain-name>.<your-domain-extension>;

    location / {
                # First attempt to serve request as file, then
                # as directory, then fall back to displaying a 404\
                try_files $uri $uri/ /index.html?/$request_uri/;
        }
}
Here in this example suppose your domain name is "google.com" Then your server_name will be
server_name http://google.com google.com www.google.com
If you don't have a domain name, you may still access your project by typing in your server's IP address and making server_name the same as it was before ( server_name _ ).
It's time to save the file on CMD after making the appropriate modifications to the default file. However, before saving the file, double-check that every line has been closed with a semicolon (";") to avoid receiving an error from nginx.
Okay thus far, I believe that everyone has now reviewed the whole file. To save the file, just hit Ctrl+S, and then press Ctrl+X to quit the default file. To make our modifications live on nginx, we must now restart the server. Run the command below to make it.
sudo service nginx restart
Next, check to see if Nginx is operating generally or experiencing any issues. Simply verify its status, as we did at the beginning of this article.
Now, if nginx is up and running, you did everything correctly by the instructions above. And if its status is failed like shown in the below image
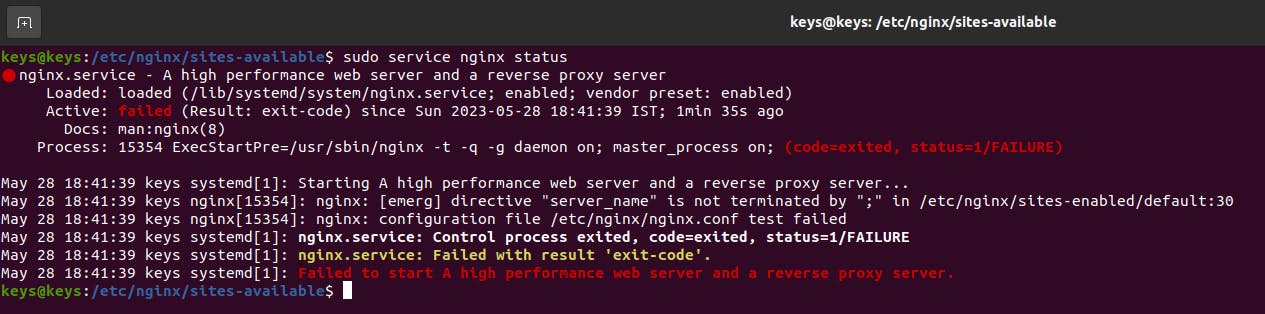
Open the default file once again and check according to the instructions above. If you can't find anything, ask me in this blog comment, and I'll be willing to assist you.
So far, we have just finished configuring Nginx. It is now time to connect our server IP to our domain. We must thus change the domain DNS record. I am aware that some readers don't quite recognize what has to be done. But don't worry, I will outline every step for you. To make it simple for you to change the DNS record. So let's begin the procedure right away:
If you open a DNS record for the first time (to do this, go to your domain portfolio, click on a domain, and then look for DNS Record), You'll see something similar to the image below.
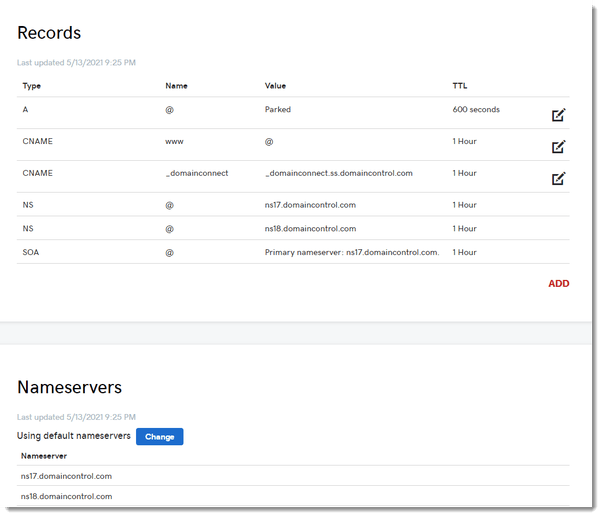
You can notice that Parked is written on type A in the image above, indicating that this domain is not configured to any servers. Now, edit the A record to include our IP address, and you will see a screen similar to the one below.
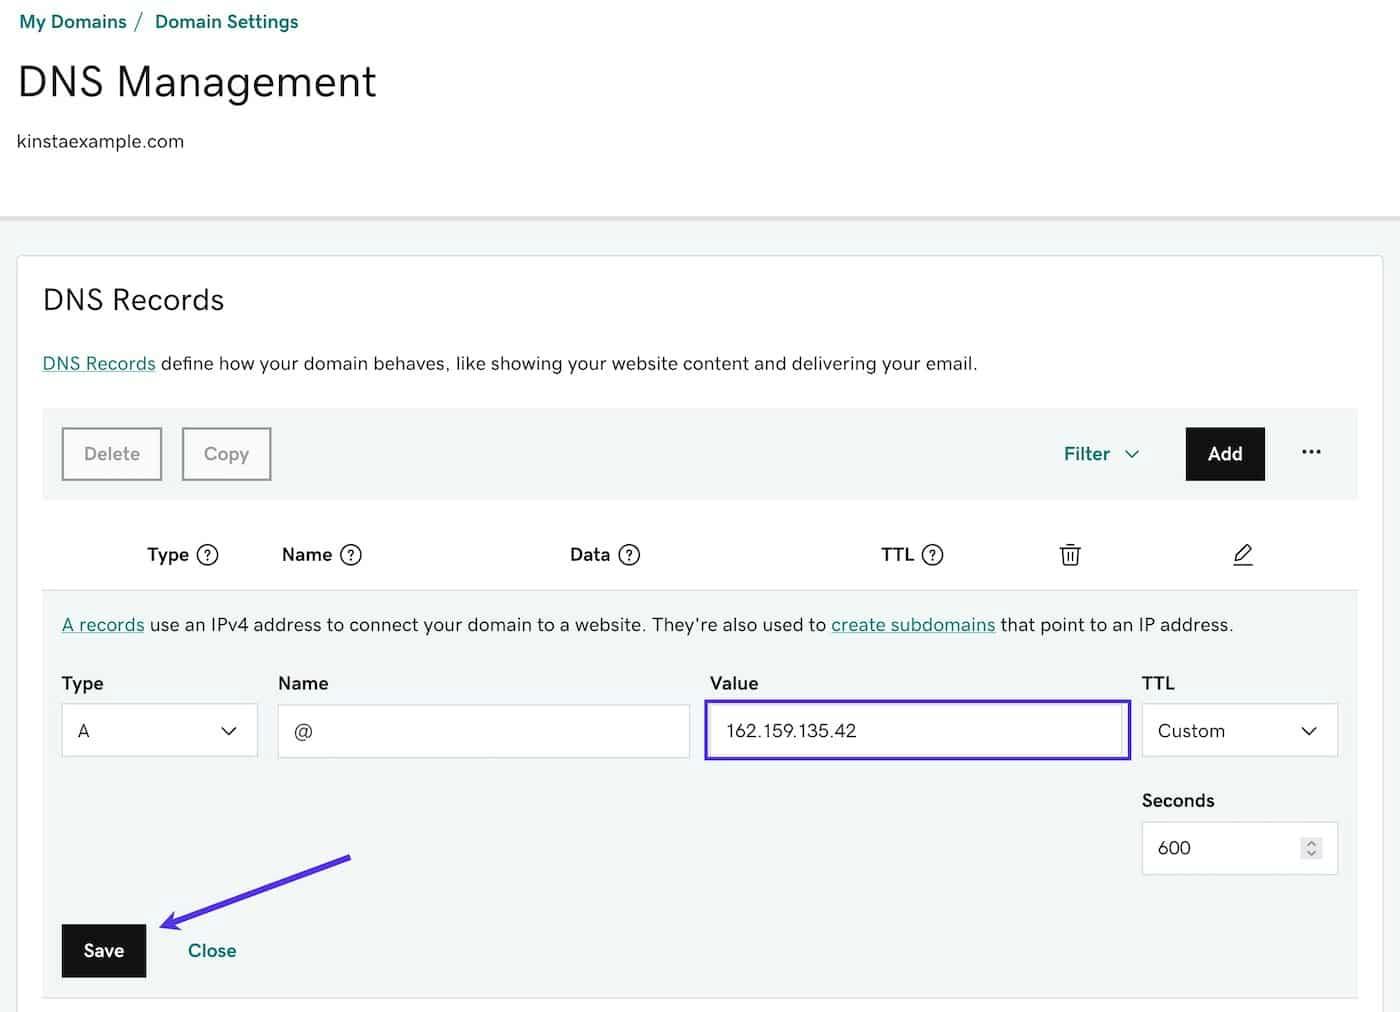
Remove "Parked" from the value, enter the server's IP address, and then click the "Save" button.
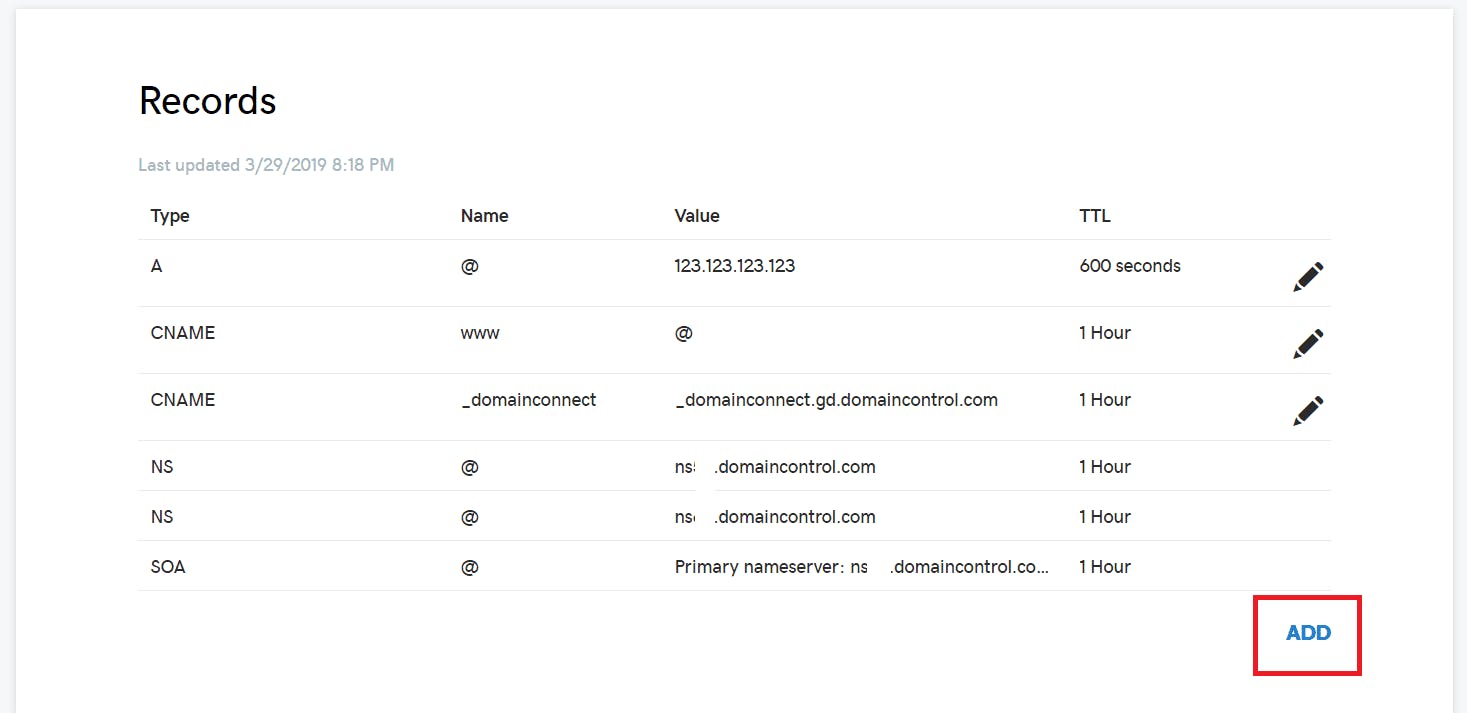
If your domain provider doesn't provide you with a default A record, you may add one by clicking the "Add" button on the DNS record. Additionally, see if the "CNAME" type's name contains "WWW" and its value is "@"; if not, add a new record with those same details. After doing this, check to see that your DNS record looks like this.
Wait 5 to 10 minutes for the DNS record to be updated. then perform a domain search at http://your-domain.com. You may now view your live website on your domain. Always call your domain "HTTP" rather than "HTTPS," because doing so will result in nothing being shown. I'll make a separate blog post to explain how to add an SSL certificate to your domain using Certbot for the conversion from "HTTP" to "HTTPS" process.
If your website or web application was not shown on your domain, double-check everything. Try restarting nginx since it can sometimes fail to receive updated files. Ask me in the comments if you are still unable to view your web application live, and I will help you.
Conclusion
As of now, you've all learned how to use an Nginx server to host your front end and link your server to a domain. I have used simple terms to explain things. To make it possible for anybody with a basic understanding of coding and a desire to host their work to do so. You can still view your frontend page by using your server IP even if you don't have a domain; all you have to do is finish the Nginx configuration.
There are many more in this, including an SSL certificate, a sub-domain configuration with one or more servers, and an SSL certificate for a wildcard sub-domain. In my upcoming blog, I'll go through all of the mentioned things. Till then, Enjoy Your Work!!
Thank You!!